
The Print Lab
01/06/2023
Heat pressing has become one of the most popular methods of decorating t-shirts and other products such as hats, bags, and jackets. This technique involves using a heat press machine to apply heat and pressure to a transfer paper that has been printed with an image or design, which is then transferred onto the garment or item being pressed. In this blog, we will discuss how to heat press t-shirts and other products, as well as the pros and cons of using this technique.
How to Heat Press T-Shirts and Other Products
Before starting the heat pressing process, it’s important to ensure that you have all the necessary materials and equipment. You’ll need a heat press machine, transfer paper, a heat-resistant mat or pad, and the garment or item you wish to decorate. Here are the steps to follow:
- Choose your design: The first step is to create or choose the design you want to transfer onto your garment or item. This can be done using software such as Adobe Photoshop or Illustrator, or by using pre-made designs that can be downloaded from various online marketplaces.
- Print your design: Once you have your design ready, you need to print it onto transfer paper using a printer that is compatible with transfer paper. Be sure to mirror your design before printing, so that it appears correctly when transferred onto the garment or item.
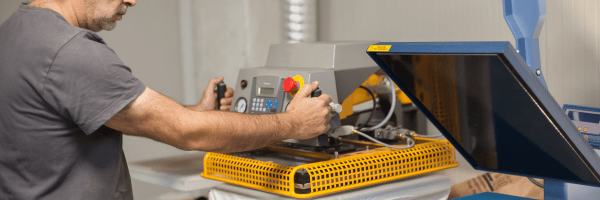
- Preheat the heat press: Turn on the heat press machine and adjust the temperature and time settings according to the type of transfer paper and garment or item you are using. Once the heat press has reached the desired temperature, place a heat-resistant mat or pad onto the bottom platen.
- Place your garment or item onto the heat press: Position your garment or item onto the heat press, making sure it is flat and centered.
- Place the transfer paper onto the garment or item: Place the transfer paper with the design facing down onto the garment or item, making sure it is centered and straight.
- Apply heat and pressure: Close the top platen of the heat press and apply heat and pressure according to the time and temperature settings specified for your transfer paper and garment or item.
- Peel off the transfer paper: Once the time is up, open the heat press and carefully peel off the transfer paper, revealing your design transferred onto your garment or item.
- Finish: Allow your garment or item to cool before handling or wearing it.
Pros and Cons of Heat Pressing
Heat pressing has several advantages and disadvantages that you should consider before deciding to use this technique.
Pros:
- Versatile: Heat pressing can be used on a variety of products, including t-shirts, hats, bags, and jackets.
- High-quality results: Heat pressing produces high-quality, vibrant designs that are long-lasting and durable.
- Cost-effective: Heat pressing is a cost-effective way to decorate garments and items, especially when producing small quantities.
- Easy to use: Heat pressing is relatively easy to learn and requires minimal training.
Cons:
- Versatile: Heat pressing can be used on a variety of products, including t-shirts, hats, bags, and jackets.
- High-quality results: Heat pressing produces high-quality, vibrant designs that are long-lasting and durable.
- Cost-effective: Heat pressing is a cost-effective way to decorate garments and items, especially when producing small quantities.
- Easy to use: Heat pressing is relatively easy to learn and requires minimal training.
Conclusion
Heat pressing is a popular and effective method of decorating t-shirts and other products. By following the steps outlined in this blog, you can achieve high-quality, long-lasting designs on your garments and items.
")
